Welcome to the Honeywell T6 Pro installation guide․ This manual provides step-by-step instructions for installing and configuring the Honeywell T6 Pro Wi-Fi Programmable Thermostat․ Proper installation ensures optimal performance and efficiency, while incorrect setup may lead to system malfunctions․ Follow the guide carefully to achieve a seamless installation process and enjoy advanced smart home integration capabilities․
1․1 Overview of the Honeywell T6 Pro Thermostat
The Honeywell T6 Pro Wi-Fi Programmable Thermostat is a cutting-edge device designed for precise temperature control and smart home integration․ With its sleek design and user-friendly interface, it offers advanced features like programmable scheduling, energy-saving modes, and remote access via Wi-Fi․ The thermostat is compatible with various HVAC systems and supports voice control through smart speakers․ Its UWP mounting system ensures easy installation, while the slider tab adjustment feature simplifies wiring configurations․ This thermostat is ideal for homeowners seeking convenience, efficiency, and seamless smart home connectivity․
1․2 Importance of Proper Installation
Proper installation of the Honeywell T6 Pro thermostat is crucial for seamless functionality and optimal performance․ Incorrect wiring or setup can lead to inefficient heating or cooling, higher energy bills, or even system malfunctions․ Ensuring all connections are secure and settings are configured correctly guarantees reliable operation, energy efficiency, and compatibility with smart home systems․ Additionally, correct installation prevents potential safety hazards and extends the lifespan of the thermostat․ Always follow the manufacturer’s guidelines to achieve a trouble-free setup and maximize the benefits of this advanced programmable thermostat․
System Requirements and Compatibility
The Honeywell T6 Pro is designed for compatibility with standard HVAC systems, requiring 24V AC power and a C-wire connection․ Ensure your system meets these requirements for proper functionality and optimal performance․
2․1 Compatible HVAC Systems
The Honeywell T6 Pro thermostat is designed to work with a wide range of HVAC systems, including forced air, heat pumps, and dual fuel systems․ It is compatible with conventional gas, oil, or electric furnaces, as well as air conditioning systems․ The thermostat also supports multi-stage heating and cooling systems, providing precise temperature control․ Ensure your HVAC system meets the compatibility requirements before installation․ For heat pumps, a suitable configuration is necessary, and some systems may require a common wire (C-wire) for proper operation․ Always verify compatibility to ensure optimal performance and avoid installation issues․
2․2 Electrical Requirements
The Honeywell T6 Pro thermostat requires a 24VAC power supply, ensuring compatibility with most HVAC systems․ A common wire (C-wire) is necessary for continuous power, enabling advanced smart features․ Verify that your system meets these requirements to prevent installation issues․ Proper wiring is critical to avoid damage or malfunction․ Always follow safety guidelines when handling electrical components, and consult a licensed electrician if unsure․ This ensures a safe and efficient installation process, optimizing the thermostat’s performance․
2․3 Wi-Fi Compatibility
The Honeywell T6 Pro thermostat is designed to work with 2․4 GHz Wi-Fi networks, ensuring compatibility with most home routers․ A stable internet connection is essential for remote access and smart features․ Ensure your network name (SSID) is visible and the password is correctly entered during setup․ Avoid using guest networks or networks with limited connectivity․ For optimal performance, the thermostat should be placed within range of your router․ A strong signal strength ensures reliable operation and seamless integration with smart home systems․ Verify network settings before proceeding with installation to avoid connectivity issues․

Pre-Installation Steps
Before starting, unpack the Honeywell T6 Pro thermostat and ensure all components are included․ Gather necessary tools and materials for a smooth installation process․
3․1 Unpacking the Thermostat
Begin by carefully opening the Honeywell T6 Pro thermostat box․ Inside, you’ll find the thermostat unit, UWP mounting bracket, wires, and a user manual․ Ensure all components are present and undamaged․ Gently remove the protective cover from the thermostat’s screen․ Lay out all items on a clean surface for easy access․ Review the manual to familiarize yourself with each part and required tools before proceeding․ This organized approach ensures a smooth installation process․
3․2 Gathering Tools and Materials
To ensure a smooth installation, gather all necessary tools and materials beforehand․ You will need a screwdriver (both Phillips and flathead), wire strippers, and a voltage tester․ Additionally, ensure you have the UWP mounting bracket, screws, and wire nuts provided with the thermostat․ Check for any additional materials required, such as wall anchors, depending on your wall type․ Always turn off the HVAC system at the circuit breaker before starting․ Refer to the Honeywell T6 Pro manual for specific tools and materials recommended for your setup․
3․3 Understanding the Thermostat Components
Familiarizing yourself with the Honeywell T6 Pro thermostat components is essential for a successful installation․ The thermostat includes a UWP mounting bracket, slider tabs for system configuration, and terminal labels for wiring connections․ The UWP bracket ensures secure wall mounting, while the slider tabs adjust settings like heat pump operation․ Terminal labels (e․g․, R, W, Y, G, C, O, B, Aux) correspond to specific HVAC functions․ Understanding these components helps ensure correct wiring and configuration, preventing installation errors and ensuring proper system operation․
Installation Process
The installation process involves preparing the site, removing the old thermostat, mounting the UWP bracket, wiring the system, and installing the new Honeywell T6 Pro thermostat․ Always follow the manufacturer’s guidelines for a safe and efficient setup․
4․1 Preparing the Installation Site
Before starting the installation, ensure the site is prepared properly․ Clear the area around the old thermostat of any obstructions․ Verify that the wall is sturdy and level to support the UWP bracket․ If replacing an old thermostat, carefully disconnect and remove it․ Turn off power to the HVAC system at the circuit breaker or fuse box for safety․ Ensure all wires are labeled if they are not already marked․ Clean the wall surface to ensure proper bracket adhesion․ Take note of any existing wiring configurations to avoid damage during the process․ Proper preparation ensures a smooth and safe installation experience․
4․2 Removing the Old Thermostat
Before installing the Honeywell T6 Pro, ensure the power to your HVAC system is turned off at the circuit breaker․ Gently pull the old thermostat away from the wall to access the wiring․ Label each wire with its corresponding terminal label (e․g․, R, W, Y, G, C) for easy identification․ Carefully disconnect the wires from the old thermostat and set it aside․ Remove any remaining adhesive or screws from the wall to prepare for the new UWP bracket installation․ This step ensures a clean and safe transition to the new thermostat․
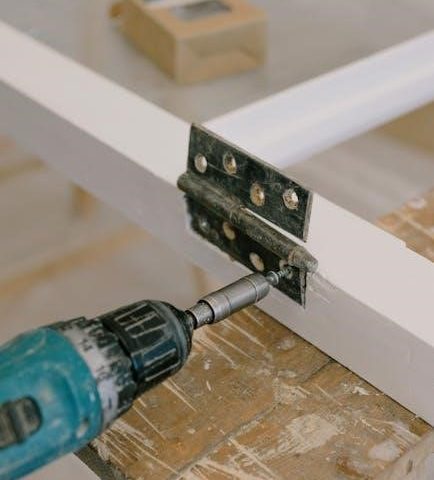
4․3 Mounting the UWP Bracket
Begin by locating the UWP (Universal Wall Plate) bracket near your HVAC system․ Remove any existing thermostat or wall plate․ Determine the correct bracket size to fit your wall space․ Secure the UWP bracket to the wall using the provided screws, ensuring it is level․ If necessary, adjust the bracket to accommodate any wiring․ Verify proper alignment and fitment before proceeding․ This step ensures a stable base for your Honeywell T6 Pro thermostat, promoting efficient installation and operation․ Always follow the manufacturer’s guidelines for mounting hardware and placement․
4․4 Wiring the Thermostat
Proper wiring is essential for the Honeywell T6 Pro Thermostat to function correctly․ Begin by matching the wires from your HVAC system to the corresponding terminals on the thermostat․ Refer to the terminal designations in the manual to ensure accurate connections․ For dual-stage systems, use the slider tab to connect the appropriate wires․ Secure all connections firmly to prevent loose wiring․ Double-check the wiring configuration before powering on the system to avoid electrical issues․ If unsure, consult the installation manual or contact a licensed professional for assistance․
4․5 Installing the Thermostat on the Bracket
Once the UWP bracket is securely mounted, align the Honeywell T6 Pro thermostat with the bracket, ensuring the mounting tabs fit into the corresponding slots․ Gently push the thermostat onto the bracket until it clicks into place․ Secure it using the provided screws, tightening them firmly but avoiding overtightening to prevent damage․ Finally, verify that the thermostat is level and properly seated on the bracket for accurate operation and optimal performance․
Terminal Designations and Wiring
Understand terminal labels for proper wire connections․ Correct wiring ensures system functionality․ Adjust slider tabs to match your HVAC system’s requirements for precise temperature control and operation․
5․1 Understanding Terminal Labels
Understanding terminal labels is crucial for correct wiring․ Each terminal (R, W, Y, G, C, etc․) corresponds to specific HVAC functions․ Mislabeling can lead to system malfunctions or safety risks․ Always refer to the Honeywell T6 Pro manual for precise terminal designations․ Ensure wires match their intended terminals to maintain proper system operation․ If unsure, consult a professional․ Correct terminal connections are essential for thermostat performance and safety․ Use the slider tabs for multi-stage systems if required․ Proper wiring ensures efficient heating, cooling, and fan control․ Double-check connections before powering on the system to avoid issues․
5․2 Connecting Wires to the Thermostat
Connecting the wires to the Honeywell T6 Pro thermostat requires careful attention to the terminal designations․ Match each wire to the correct terminal label (e․g․, R, W, Y, G, C) as indicated in the installation manual․ Ensure the wires are securely inserted into their respective terminals․ For systems with a slider tab, adjust it to fit the number of stages your HVAC system supports․ Proper wiring ensures smooth operation and prevents potential malfunctions․ Refer to the terminal designations section for detailed guidance on wire connections and configurations․
5․3 Slider Tab Adjustment
The slider tabs on the Honeywell T6 Pro thermostat are essential for configuring the wiring setup to match your HVAC system․ To adjust the slider tabs, locate them on the UWP mounting bracket․ Gently move the tabs to the correct positions based on your system’s wiring requirements․ Proper alignment ensures accurate connections and prevents installation errors․ Refer to the terminal designations in the manual for guidance․ Once set, secure the tabs to maintain the configuration․ Incorrect slider tab placement can lead to system malfunctions, so double-check the settings before proceeding with wiring․
Initial Setup and Configuration
Power on the thermostat and navigate through the menu to set up basic options․ Connect to Wi-Fi by holding the temperature button to access the network settings․
6․1 Powering On the Thermostat
After installing the Honeywell T6 Pro, insert the batteries into the thermostat․ Ensure the display lights up, indicating power․ If no display appears, check battery polarity and connections․ Secure all wiring to prevent loose connections, which can cause malfunctions․ Once powered on, the thermostat will prompt initial setup options․ Follow on-screen instructions to complete the setup process․ Verify that the system responds correctly to temperature adjustments․ If issues arise, refer to the troubleshooting section for guidance․ Proper power-up ensures smooth operation and integration with smart home systems․
6․2 Setting Up the Installer Options
After powering on the thermostat, access the Installer Setup Menu to configure advanced settings․ Navigate through the menu to set temperature ranges, fan operation, and ventilation systems․ Ensure all options align with your HVAC system’s requirements․ Common issues like Wi-Fi connectivity can be resolved by resetting the thermostat or checking network settings․ Refer to the manual for detailed instructions on each parameter to avoid errors․ Proper configuration ensures efficient system performance and integrates seamlessly with smart home systems․
6․3 Configuring Wi-Fi Settings
To configure Wi-Fi settings on the Honeywell T6 Pro, navigate to the network menu․ Select your home Wi-Fi network from the list of available options․ Enter your Wi-Fi password using the touchscreen interface․ Ensure the thermostat is within range of your router for a stable connection․ Once connected, the thermostat will confirm the link․ Use the Honeywell Home app to complete any additional setup, such as remote access or voice control integration․ A successful connection enables smart features like geofencing and energy usage monitoring․
Advanced Installer Setup Options
7․1 Using the Installer Setup Menu
Access advanced settings through the Installer Setup Menu to customize system operation, including temperature limits and fan control, ensuring optimal performance for your HVAC system․
The Installer Setup Menu on the Honeywell T6 Pro thermostat allows professionals to configure advanced settings for optimal system performance․ Accessible via the thermostat interface, this menu provides options for adjusting system operation settings, fan operation, and ventilation controls․ Installers can customize parameters such as temperature ranges, fan timing, and smart home integration preferences․ Proper navigation of this menu ensures the thermostat functions efficiently with the HVAC system․ Always refer to the manual or guided prompts for precise adjustments, as incorrect settings may affect performance․ This step is crucial for achieving a tailored and energy-efficient setup․
7․2 Adjusting Advanced Settings
The Honeywell T6 Pro thermostat offers advanced settings for fine-tuning system performance․ Access the Installer Setup Menu to adjust parameters like temperature limits, fan operation, and ventilation timing․ These settings ensure compatibility with your HVAC system and optimize energy efficiency․ For example, you can modify the temperature differential or adjust the compressor protection time․ Use the slider tabs to set these values carefully, as improper adjustments may affect system operation․ Refer to the manual for specific guidelines and ensure all changes align with your HVAC equipment specifications to maintain optimal performance and efficiency․
Programming the Thermostat
Programming the Honeywell T6 Pro allows you to set temperature schedules, ensuring energy efficiency and comfort․ Use the app or thermostat interface to create daily heating and cooling schedules, adjust temperature ranges, and enable vacation mode for energy savings when away․ This feature helps balance comfort and energy conservation effectively․
8․1 Creating a Daily Schedule
To create a daily schedule on the Honeywell T6 Pro, navigate to the “Schedule” menu via the touchscreen interface․ Set specific temperature targets for different times of the day, such as waking up, leaving home, and returning․ Utilize the geofencing feature by connecting your smartphone to automatically adjust temperatures based on your location․ Ensure the schedule repeats daily, with optional adjustments for weekends; Test the schedule to confirm it operates as intended, and refer to the user manual for detailed guidance․ This setup optimizes energy efficiency and comfort․
8․2 Setting Temperature Ranges
The Honeywell T6 Pro allows users to set temperature ranges for both heating and cooling modes․ These ranges ensure the system operates within comfortable and efficient parameters․ For example, set the heating range between 60°F and 80°F, and the cooling range between 65°F and 85°F․ Adjust these ranges in the thermostat settings to match your preferences․ Properly configured temperature ranges help maintain energy efficiency and prevent extreme temperature fluctuations․ Use the touchscreen interface to easily modify these settings, ensuring your home remains comfortable while optimizing energy usage․
8․3 Enabling Vacation Mode
To enable Vacation Mode on your Honeywell T6 Pro thermostat, navigate to the main menu and select the “Vacation Mode” option․ Set your preferred temperature range and duration․ This feature allows you to save energy while away, ensuring your home remains comfortable upon return․ Confirm your settings to activate the mode․
Maintenance and Troubleshooting
Regular maintenance ensures the Honeywell T6 Pro thermostat operates efficiently․ Troubleshooting common issues like connectivity problems or display malfunctions can often be resolved with a simple reset․
9․1 Replacing the Batteries
To replace the batteries in your Honeywell T6 Pro thermostat, first, ensure the system is turned off․ Locate the battery compartment, typically found on the back or bottom of the device․ Open it and remove the old batteries․ Insert the new ones, making sure they are correctly oriented and the compartment is securely closed․ Turn the thermostat back on and wait for it to restart․ If the display doesn’t turn on, check the connections or perform a reset․ Always use the recommended battery type for optimal performance․
9․2 Resetting the Thermostat
9․2 Resetting the Honeywell T6 Pro Thermostat
To reset the Honeywell T6 Pro thermostat, press and hold the temperature button for 5 seconds․ This action will restore factory settings, resolving connectivity issues and software glitches․
9․3 Common Issues and Solutions
Common issues during Honeywell T6 Pro installation include Wi-Fi connectivity problems, incorrect wiring, or unresponsive displays․ For Wi-Fi issues, ensure the thermostat is in router range and restart both devices․ If the display is unresponsive, check wiring connections or perform a factory reset․ Battery drainage can occur if the system is not properly powered; verify electrical connections․ Sensor malfunctions may cause inaccurate temperature readings; clean or replace sensors as needed․ Refer to the manual for troubleshooting steps or contact Honeywell support for assistance․ Regular updates and proper maintenance can prevent many of these issues․

Working with Smart Home Systems
The Honeywell T6 Pro integrates seamlessly with smart home systems like Honeywell Home, enabling voice control through compatible smart speakers for enhanced convenience and efficiency․
10․1 Integrating with Honeywell Home
Integrating the Honeywell T6 Pro with Honeywell Home systems allows seamless control and monitoring through the Honeywell Home app․ This integration enables users to adjust settings, receive notifications, and access advanced features like geofencing and smart alerts․ The thermostat works alongside other Honeywell Home devices, creating a unified smart home experience․ Ensure your system is connected to Wi-Fi and follow the app’s pairing instructions for a smooth setup․ This integration enhances convenience and optimizes energy efficiency, making it easier to manage your home’s comfort from anywhere․
- Access thermostat controls via the Honeywell Home app․
- Receive alerts for system status and maintenance needs․
- Enable geofencing for location-based temperature adjustments․
- Compatibility with voice assistants for hands-free control․
10․2 Compatibility with Smart Speakers
The Honeywell T6 Pro thermostat seamlessly integrates with popular smart speakers like Amazon Alexa and Google Assistant․ This compatibility allows users to control their home’s temperature with voice commands, enhancing convenience and efficiency․ Ensure your thermostat is connected to the Honeywell Home app and linked to your smart speaker system for a smooth experience․ Proper Wi-Fi setup is essential for enabling voice control features․ Refer to the Honeywell Home app for detailed pairing instructions and troubleshooting tips to maximize your smart home integration․
Proper installation ensures optimal performance․ The Honeywell T6 Pro offers advanced features for smart home integration․ Final checks confirm everything is working smoothly, and you can now enjoy the benefits of your new thermostat․
11․1 Final Checks After Installation
After completing the installation, perform a final check to ensure everything functions correctly․ Verify that the thermostat powers on and the display responds to touch inputs․ Check all wire connections for secureness and proper terminal labeling․ Test the HVAC system to confirm heating, cooling, and fan modes operate as expected․ Ensure the Wi-Fi connection is stable and the thermostat is connected to your smart home system․ Review the slider tab settings and advanced configurations for accuracy․ Finally, test the daily schedule and temperature ranges to ensure they align with your preferences․ Refer to the manual if any issues arise during these checks․
11․2 Ensuring Optimal Performance
To ensure the Honeywell T6 Pro operates efficiently, regular maintenance and checks are essential; Keep the thermostat clean and free from dust․ Update the software periodically for improved functionality․ Verify that the Wi-Fi connection is stable to maintain smart home integration․ Check battery levels regularly to avoid unexpected shutdowns․ Schedule filter reminders to maintain proper airflow․ Ensure all wiring connections are secure and correct․ Refer to the troubleshooting section if issues arise․ Proper care and attention will extend the thermostat’s lifespan and ensure reliable performance․ Regular maintenance guarantees consistent heating and cooling efficiency․